> ## Documentation Index
> Fetch the complete documentation index at: https://docs.proddyai.app/llms.txt
> Use this file to discover all available pages before exploring further.
# Manage
> The tab allows you to manage and customise your workspace to fit your needs. It gives you control over active channels, members, and member access and integrations in your workspace
**NOTE:** This option is available only for workspace owners and administrators. To learn more on granting administrator permissions, click here.
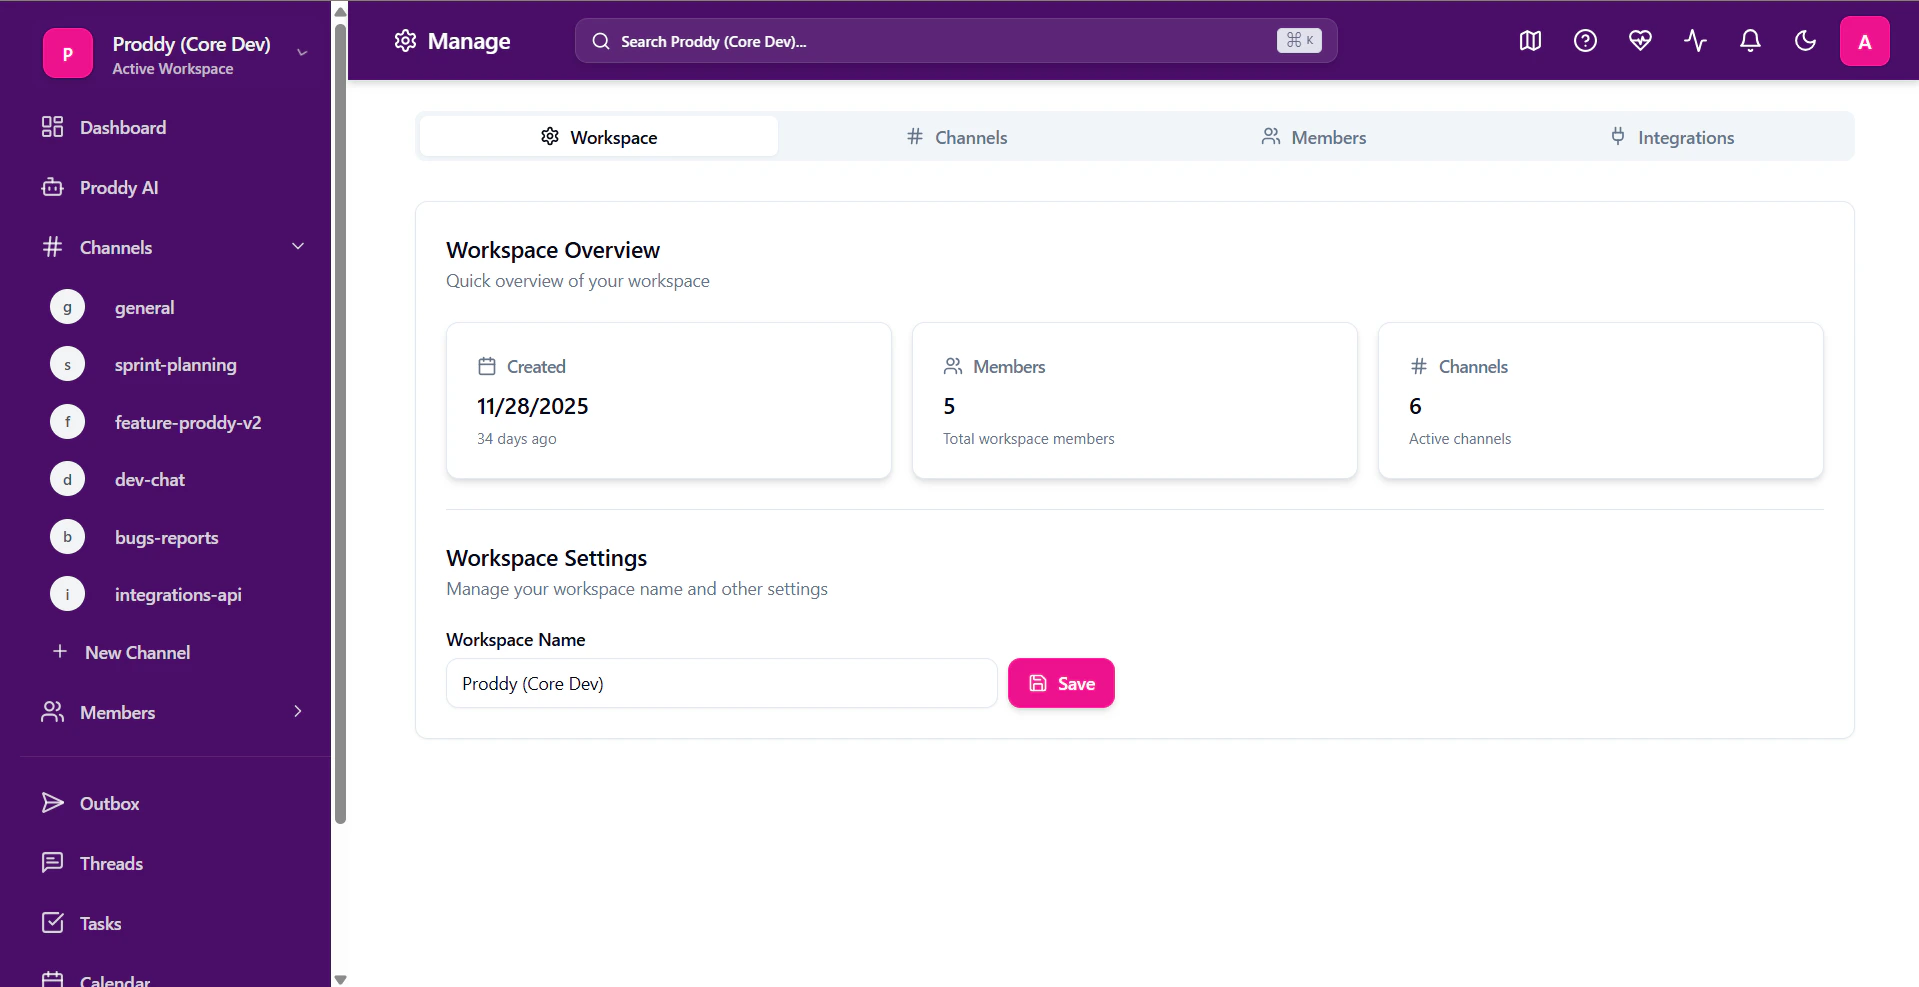 ### **How to access it?**
**Manage** is available in the sidebar of your workspace.
1. Expand the sidebar.
2. Click on **Manage** to open the **Manage** page.
### **How to access it?**
**Manage** is available in the sidebar of your workspace.
1. Expand the sidebar.
2. Click on **Manage** to open the **Manage** page.
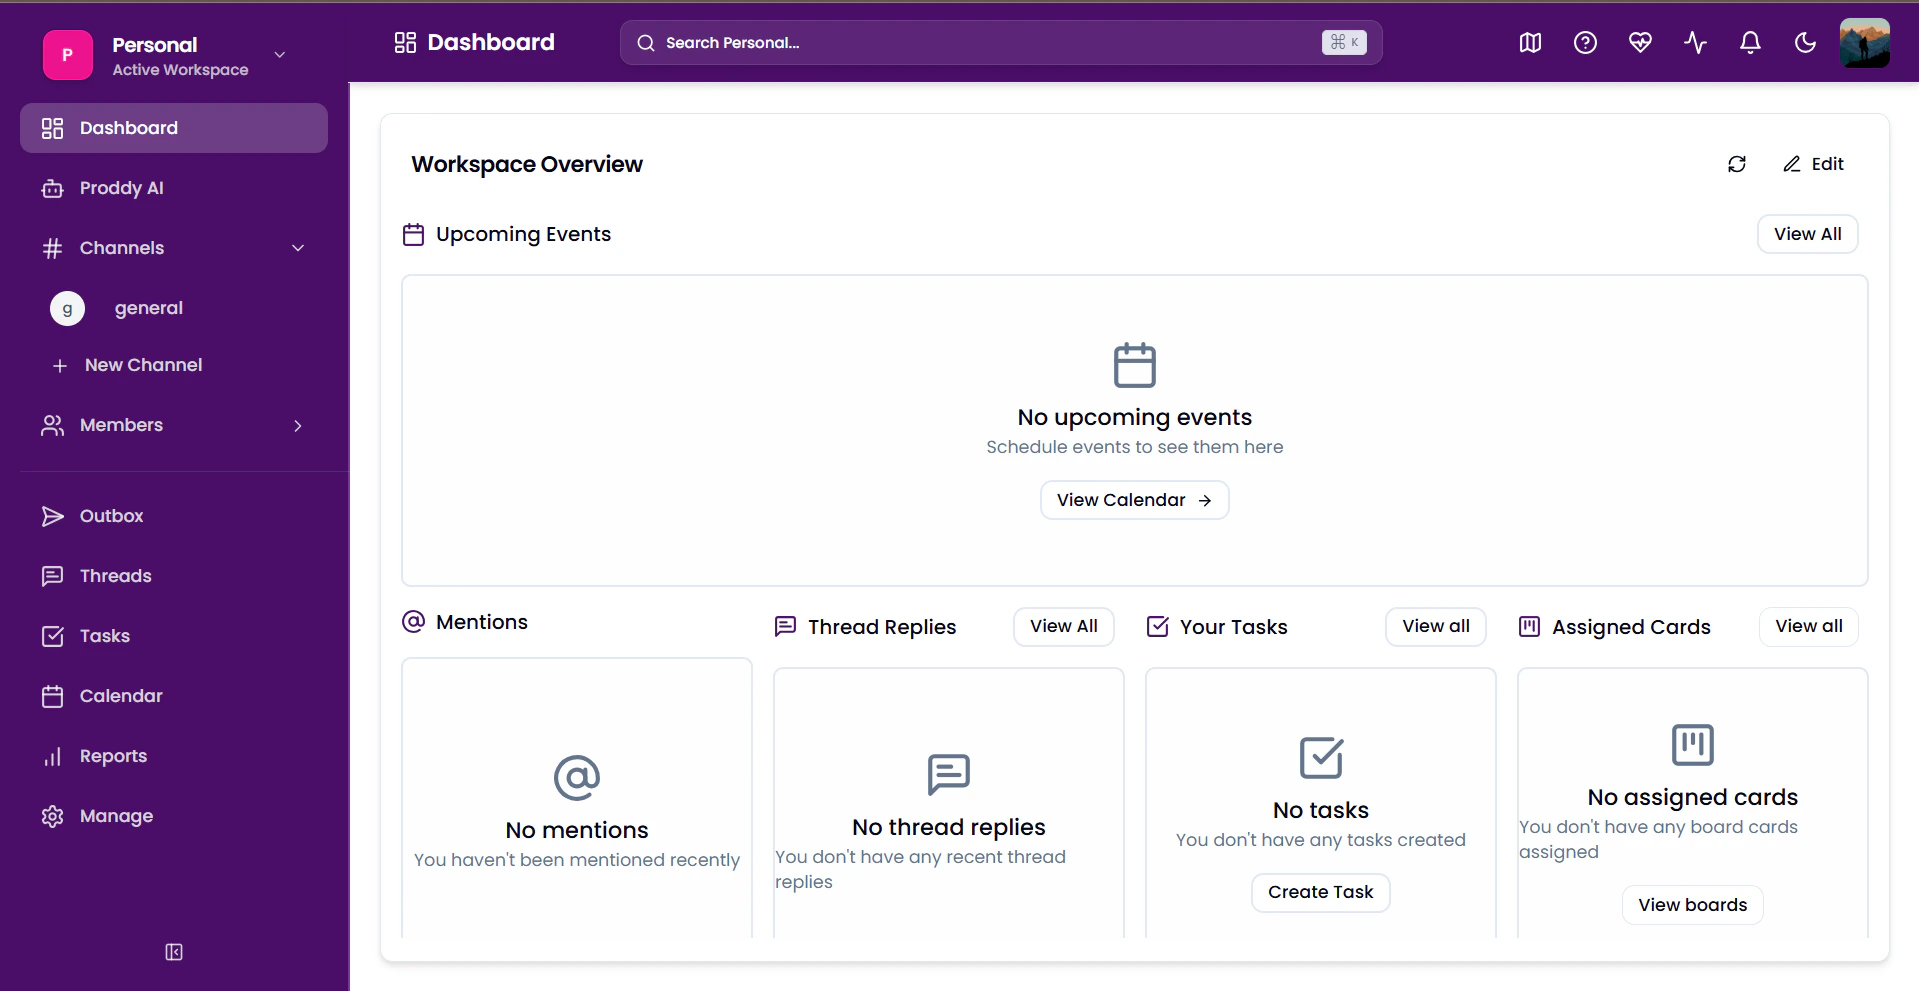 # **Workspace**
### **Renaming a Workspace**
To rename a workspace:
1. Open the **Manage** page.
2. Under the **Workspace** tab, find the **Workspace Name** option inside **Workspace Settings.**
3. Type in the new name and click **Save**.
4. Your workspace name will be updated.
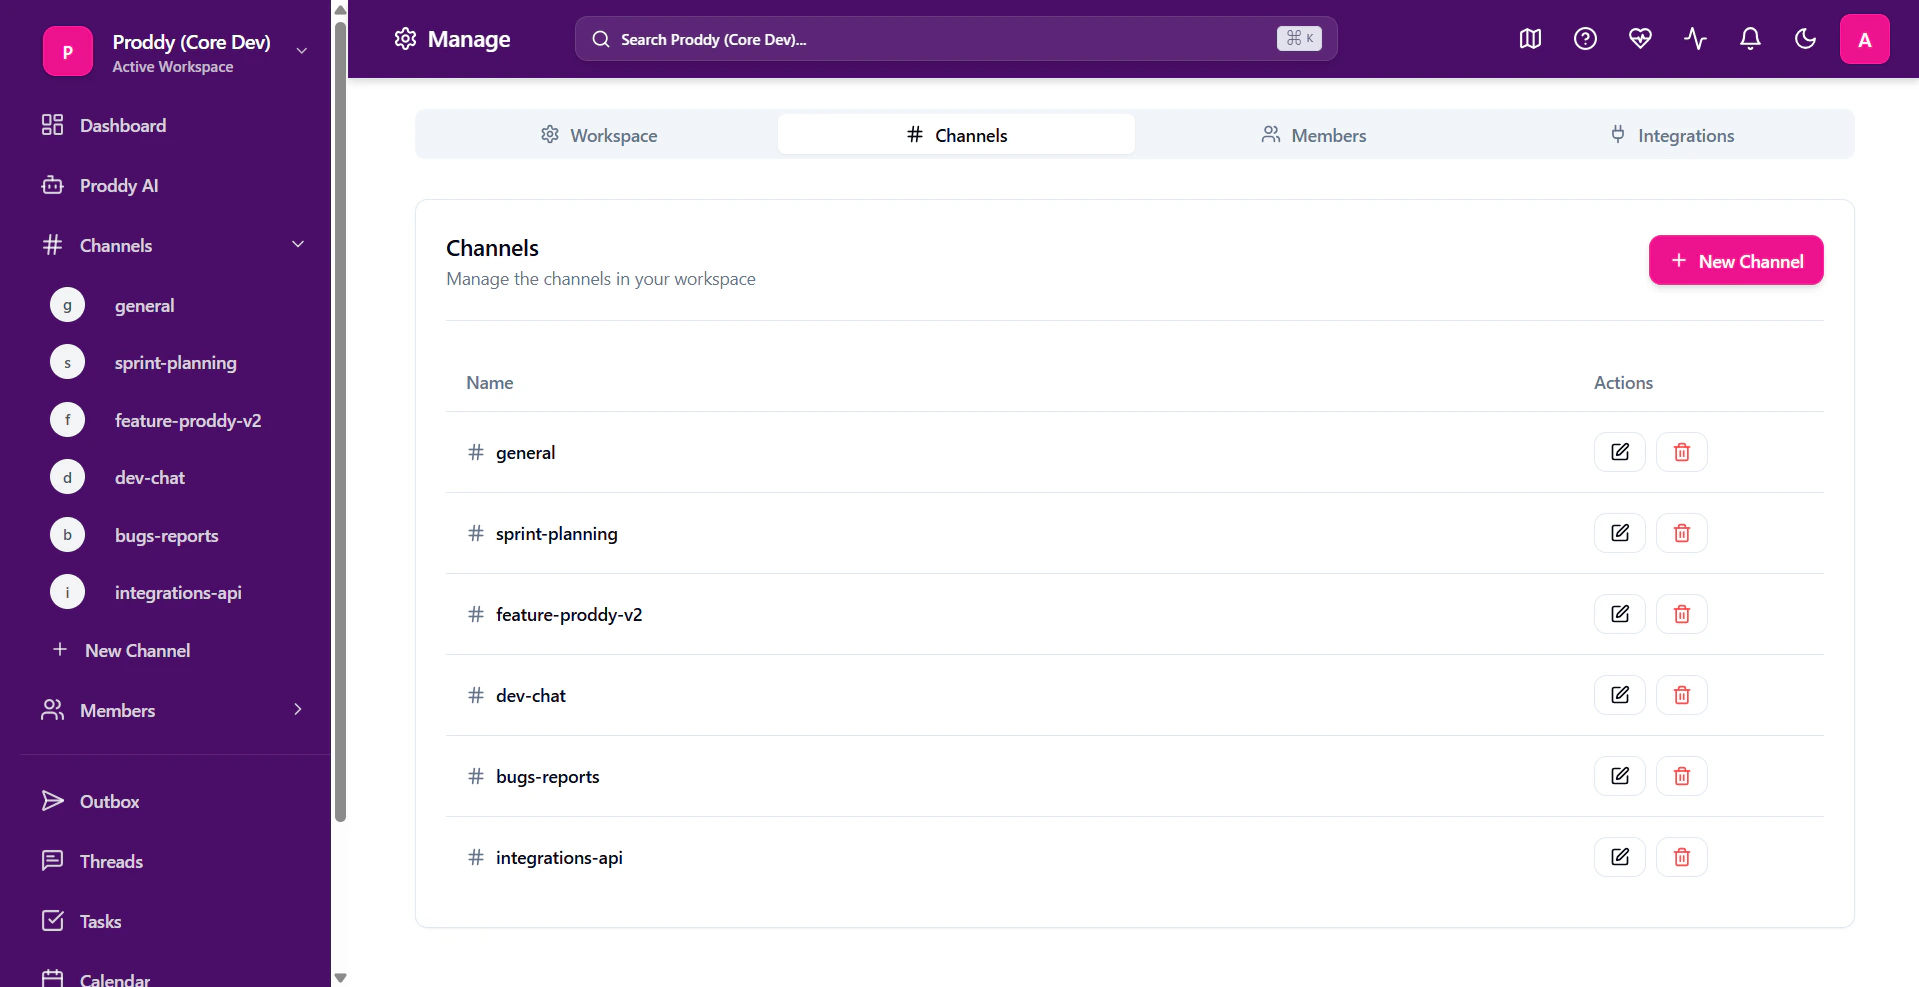
# **Channels**
This tab manages all the active channels inside the workspace.
To access the **Channels** tab:
1. Open the **Manage** page.
2. Select **Channels** from the given tab menu.
# **Workspace**
### **Renaming a Workspace**
To rename a workspace:
1. Open the **Manage** page.
2. Under the **Workspace** tab, find the **Workspace Name** option inside **Workspace Settings.**
3. Type in the new name and click **Save**.
4. Your workspace name will be updated.
# **Channels**
This tab manages all the active channels inside the workspace.
To access the **Channels** tab:
1. Open the **Manage** page.
2. Select **Channels** from the given tab menu.
 ### **Creating a new Channel**
To create a new channel:
* Open the **Manage** page.
* Go to the **Channels** tab as directed above.
* Click on **the New Channel** option.
* Enter a name for the channel, and select an emoji (optional)
### **Creating a new Channel**
To create a new channel:
* Open the **Manage** page.
* Go to the **Channels** tab as directed above.
* Click on **the New Channel** option.
* Enter a name for the channel, and select an emoji (optional)
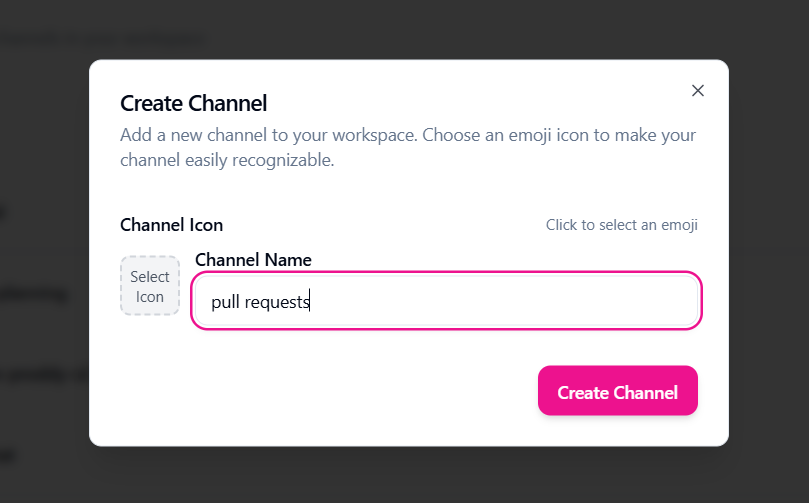 Then click on **Create Channel** to add it to your channels list.
### **Edit a Channel**
To edit a channel in the workspace:
1. Open the **Manage** page.
2. Go to the **Channels** tab as directed above.
3. Click on the edit icon next to the active channels.
4. After editing, click on **Update Channel** to save your edits.
### **Deleting a Channel**
To delete a channel in the workspace:
1. Open the **Manage** page.
2. Go to the **Channels** tab as directed above.
3. Click on the delete icon next to the active channels.
4. Confirm your choice by clicking on **'Delete'**.
**Caution**: This action cannot be undone. This will permanently delete the channel and all of its messages.
# **Members**
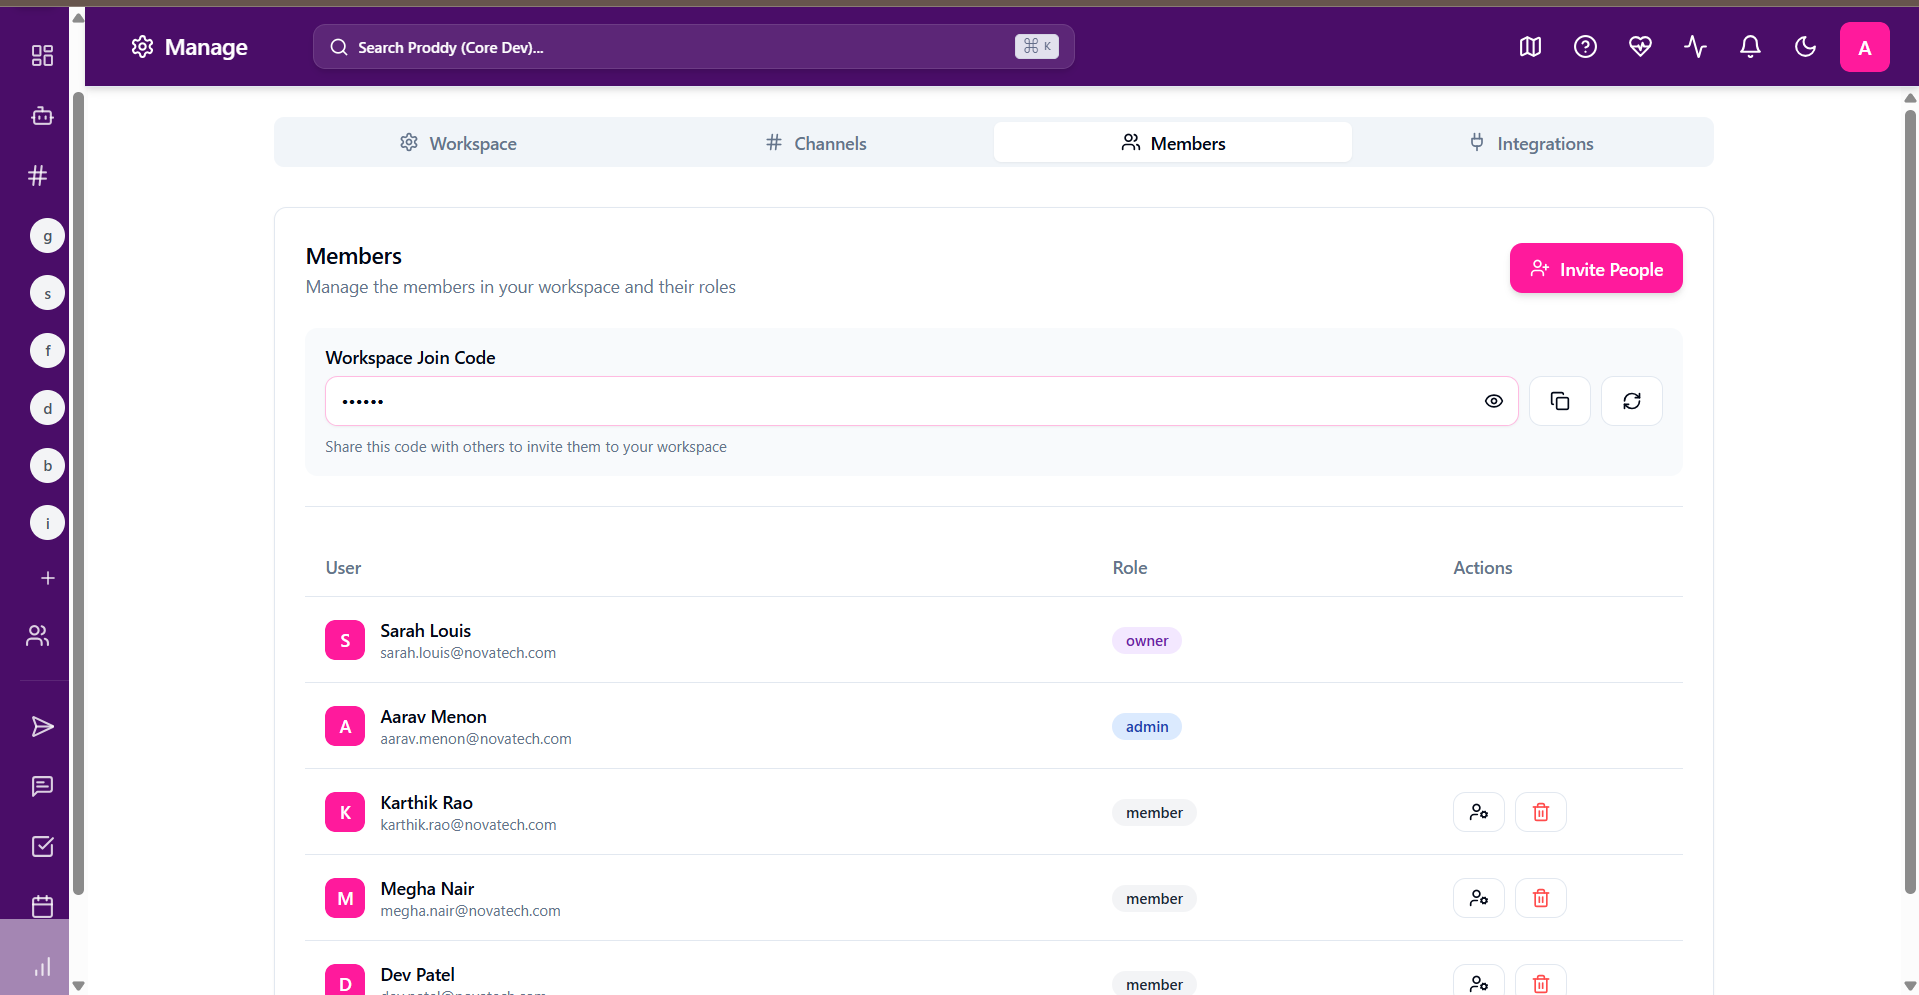
Manage workspace members and permissions. This section allows administrators to invite new users, assign roles, and control account access levels.
To access it,
1. Open the **Manage** page.
2. Select the **Members tab** from the given tab menu.
Then click on **Create Channel** to add it to your channels list.
### **Edit a Channel**
To edit a channel in the workspace:
1. Open the **Manage** page.
2. Go to the **Channels** tab as directed above.
3. Click on the edit icon next to the active channels.
4. After editing, click on **Update Channel** to save your edits.
### **Deleting a Channel**
To delete a channel in the workspace:
1. Open the **Manage** page.
2. Go to the **Channels** tab as directed above.
3. Click on the delete icon next to the active channels.
4. Confirm your choice by clicking on **'Delete'**.
**Caution**: This action cannot be undone. This will permanently delete the channel and all of its messages.
# **Members**
Manage workspace members and permissions. This section allows administrators to invite new users, assign roles, and control account access levels.
To access it,
1. Open the **Manage** page.
2. Select the **Members tab** from the given tab menu.
 ### **Inviting new Members**
You can invite new members to your workspace by sharing your workspace link and code with them. To know more about joining a workspace, click here.
To invite a member:
1. Open **the Manage** page.
2. Go to the Members tab as directed above.
3. Click on **Invite People**.
4. Copy the link and code and share it with your teammates.
### **Changing the workspace code**
To create a new code for the workspace:
1. Open **the Manage** page.
2. Go to the Members tab as directed above.
3. Click on the refresh icon to change the workspace code.
4. Share it with your teammates to help them join your workspace.
### **Editing User Permissions**
To change user permissions:
1. Open **the Manage** page.
2. Go to **the Members** tab as directed above.
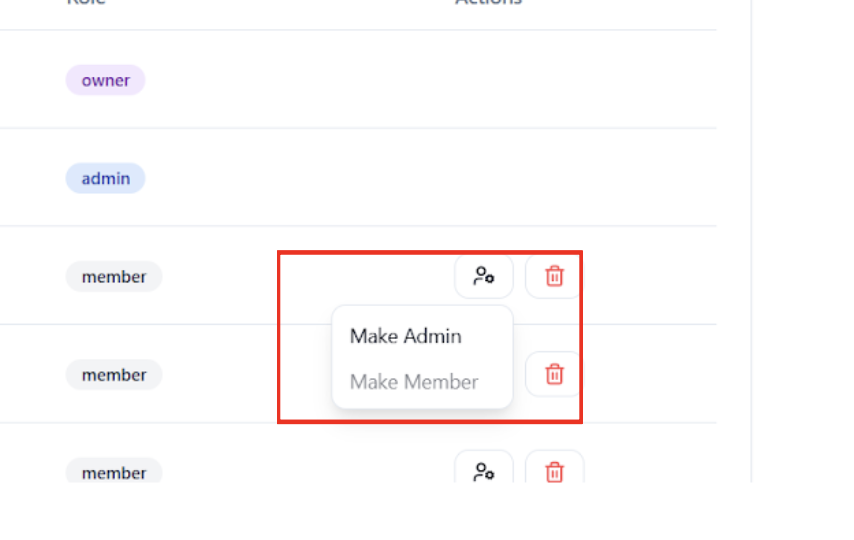
3. Click on the user icon next to the user name.
4. Select from the following options:
1. Make Owner
2. Make Admin
3. Make Member
### **Inviting new Members**
You can invite new members to your workspace by sharing your workspace link and code with them. To know more about joining a workspace, click here.
To invite a member:
1. Open **the Manage** page.
2. Go to the Members tab as directed above.
3. Click on **Invite People**.
4. Copy the link and code and share it with your teammates.
### **Changing the workspace code**
To create a new code for the workspace:
1. Open **the Manage** page.
2. Go to the Members tab as directed above.
3. Click on the refresh icon to change the workspace code.
4. Share it with your teammates to help them join your workspace.
### **Editing User Permissions**
To change user permissions:
1. Open **the Manage** page.
2. Go to **the Members** tab as directed above.
3. Click on the user icon next to the user name.
4. Select from the following options:
1. Make Owner
2. Make Admin
3. Make Member
 ### **Removing a User**
To remove a user from the workspace:
1. Open **Manage** page.
2. Go to the Members tab as directed above.
3. Click on the Delete icon next to the users to remove their access to the workspace.
4. Click on **Remove Member** to confirm your action.
**Caution**: This action cannot be undone. This will remove the member from your workspace and delete all of their messages and reactions.
# **Integrations**
This tab shows settings related to connecting your workspace with various other third-party apps. This effectively increases productivity of the workspace by integrating all into one place.
To access it:
1. Open the **Manage** page.
2. Select **Integrations** from the given tab menu.
### **Removing a User**
To remove a user from the workspace:
1. Open **Manage** page.
2. Go to the Members tab as directed above.
3. Click on the Delete icon next to the users to remove their access to the workspace.
4. Click on **Remove Member** to confirm your action.
**Caution**: This action cannot be undone. This will remove the member from your workspace and delete all of their messages and reactions.
# **Integrations**
This tab shows settings related to connecting your workspace with various other third-party apps. This effectively increases productivity of the workspace by integrating all into one place.
To access it:
1. Open the **Manage** page.
2. Select **Integrations** from the given tab menu.
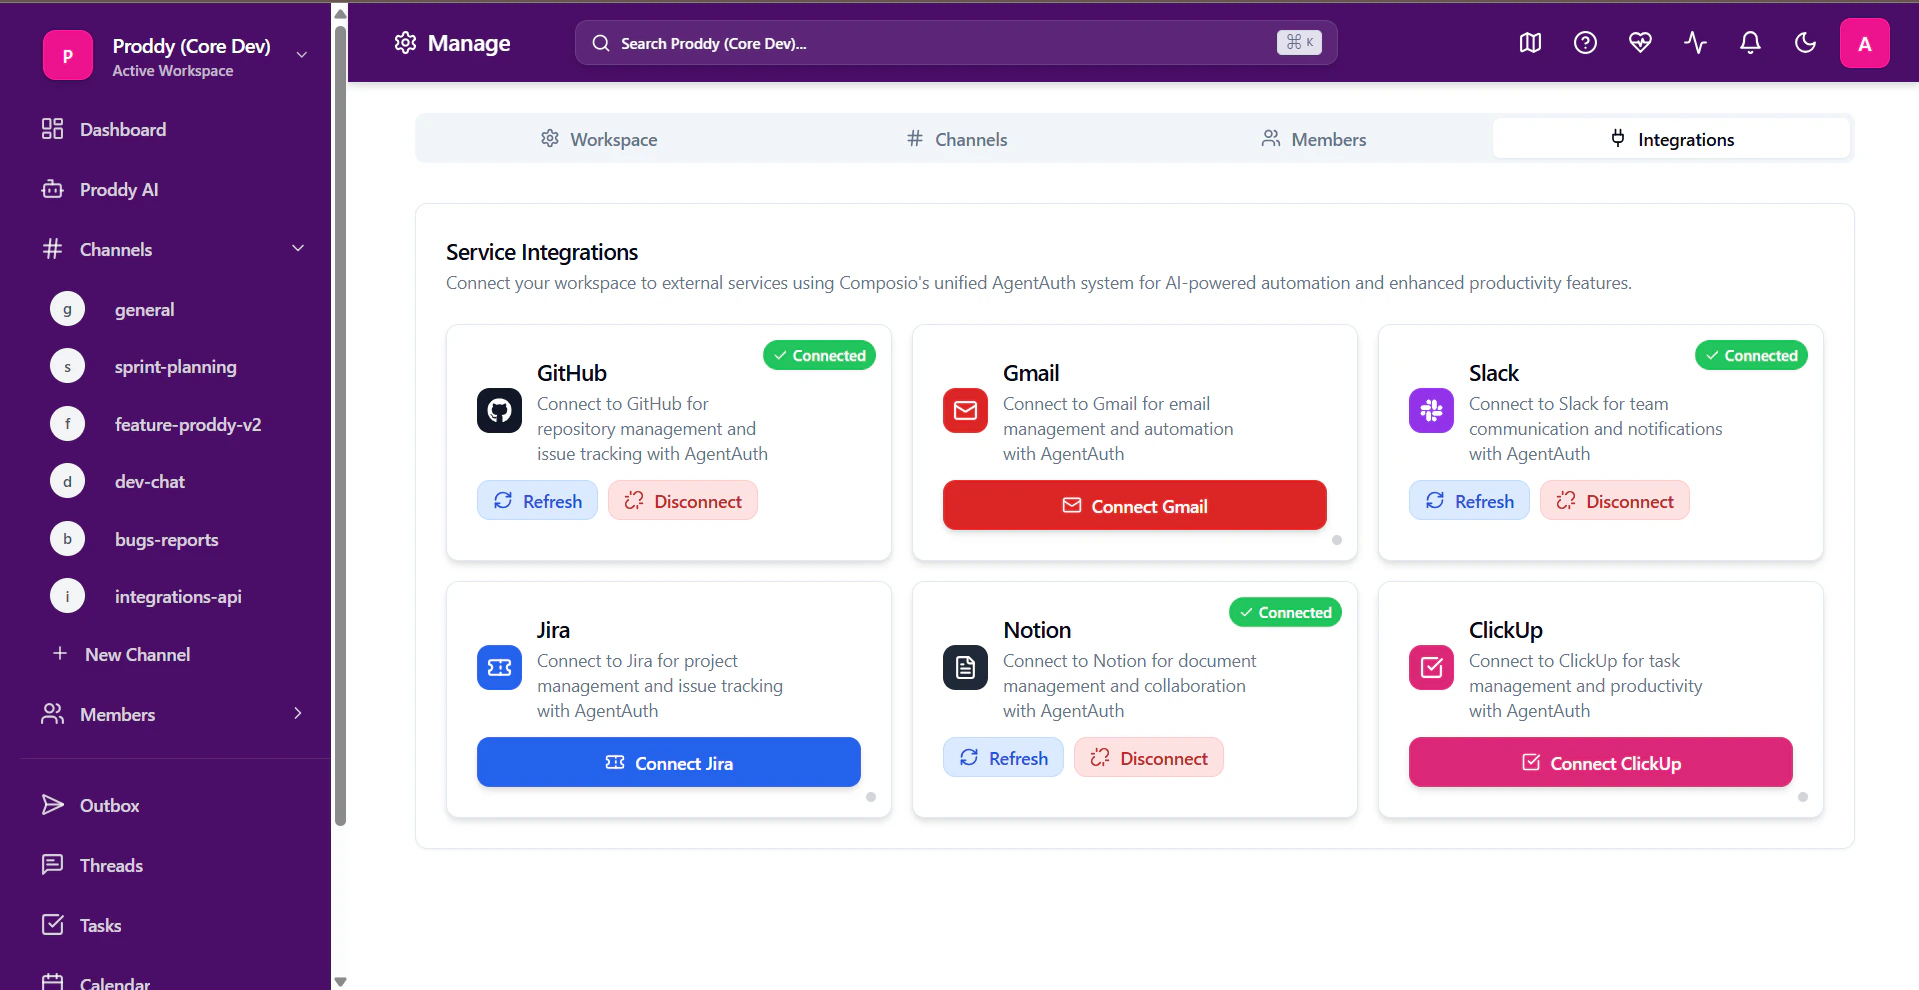 You can integrate any of the following third-party services:
* GitHub
* Gmail
* Slack
* Jira
* Notion
* ClickUp
**Note**: You can refresh each connection by clicking on the **Refresh** button.
You can integrate any of the following third-party services:
* GitHub
* Gmail
* Slack
* Jira
* Notion
* ClickUp
**Note**: You can refresh each connection by clicking on the **Refresh** button.